Flats are "flat field" frames taken with the camera to get rid of dust and uneven illumination, my flats have always been terrible. You are supposed to take a short exposure of a perfectly illuminated white flat surface, but you can't take the camera off the scope to do it. So... I googled how to make one and this is what I came up with.
8 sheets of 20" x 30" Foam Core from wallyworld @ 2 bucks ea.
35 W 12V car light from wallyworld @ 12 bucks
Wife donated drafting paper
Duck tape, glue, compass, razor knife.
Cut all the Sheets in half
 Then take 4 of those and cut them into 15" squares, so you end up with 5" strips, cut the strips into 1" sections
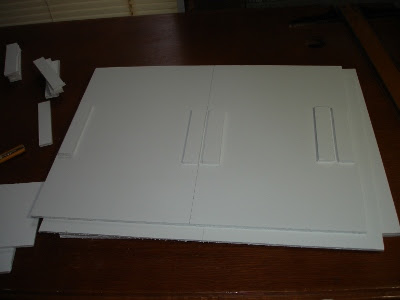
 You now have 4 15x20" sheets for the box and 4 15x15" sheets for the baffles.
The small 1" strips are glued to the outer box sections for support of the baffles...like so.
 The 2 baffles in the middle will have 11" holes in the middle, the top will have will have a hole big enough for the light and the bottom will have a hole just big enough to fit over the tube of the telescope. Tape drafting paper on the tops of the baffles to cover the holes (except the bottom one, it goes over the scope) and tape the whole thing up. I did end up having to cut the width of a sheet of foam coar off the all the baffles so the last section of box would fit flat. I plan to try it out tonight when I borrow the DSLR camera. I left the box taped together with masking tape so I can take it apart and add more drafting paper if needed, or maybe another baffle. When I'm happy I will tape all the seams with white duct tape and it will look great.

8 sheets of 20" x 30" Foam Core from wallyworld @ 2 bucks ea.
35 W 12V car light from wallyworld @ 12 bucks
Wife donated drafting paper
Duck tape, glue, compass, razor knife.
Cut all the Sheets in half
The small 1" strips are glued to the outer box sections for support of the baffles...like so.

No comments:
Post a Comment